快速入门-API使用文档
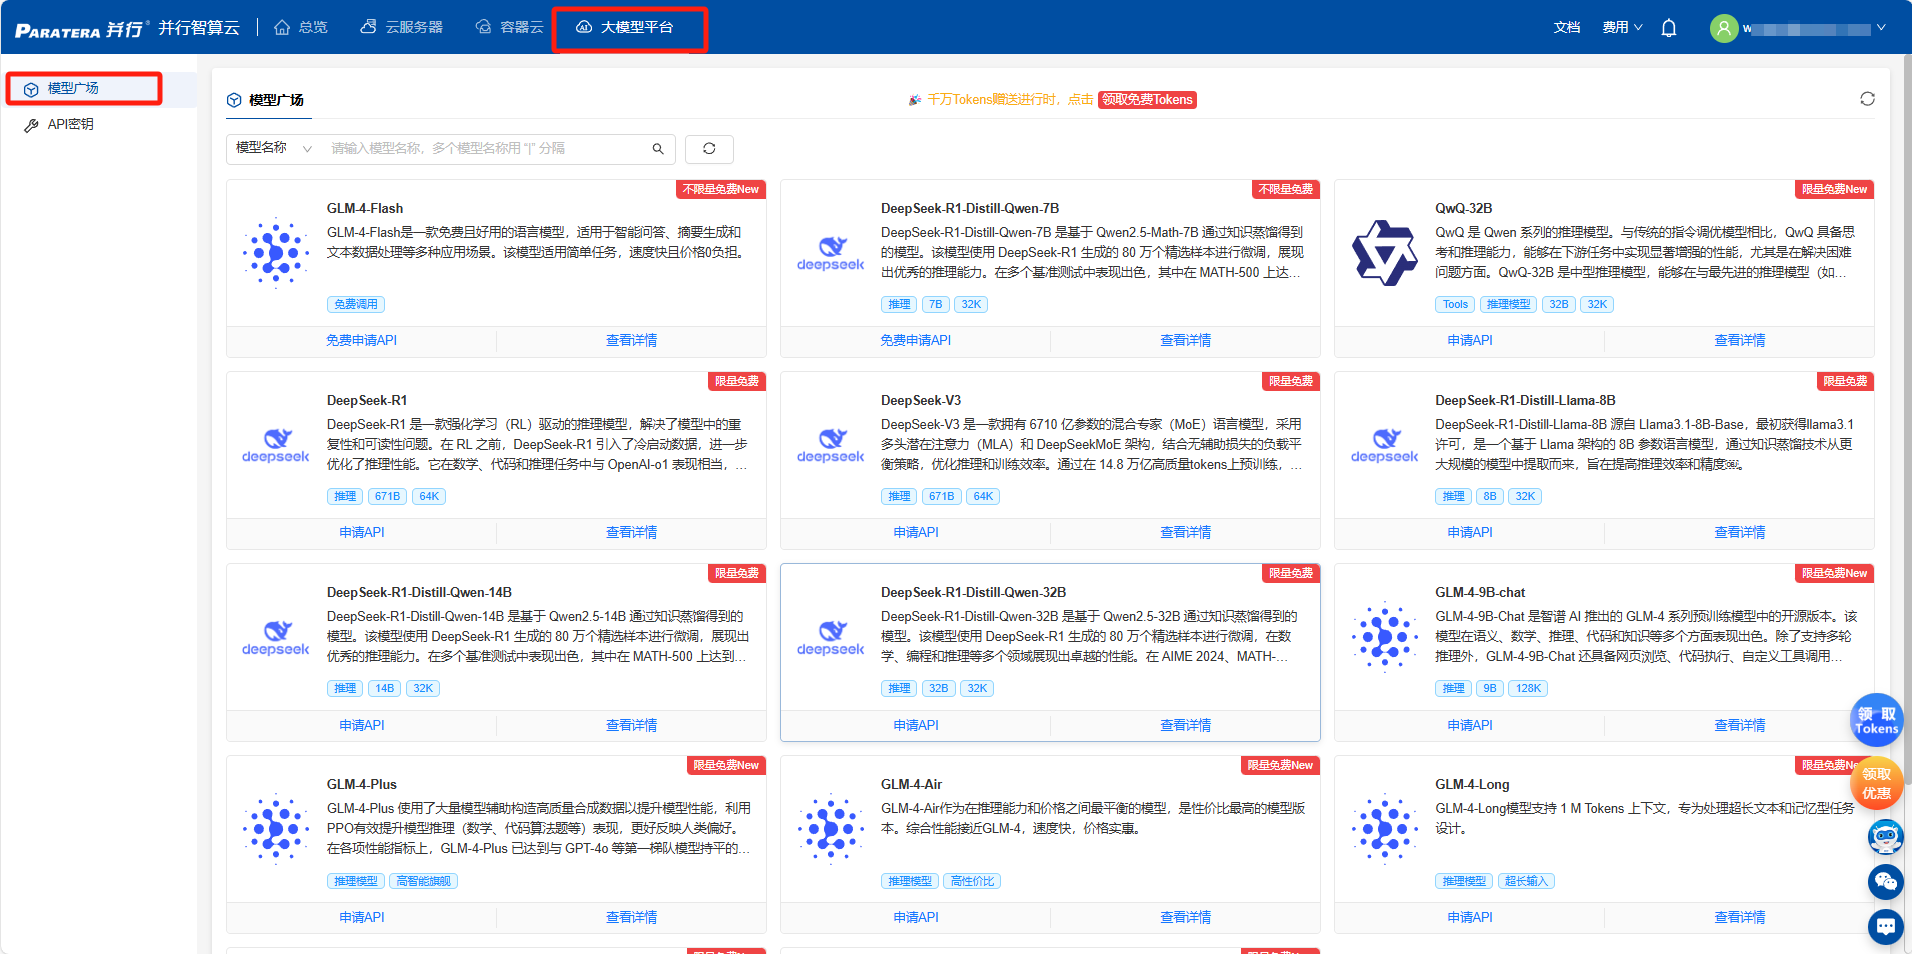
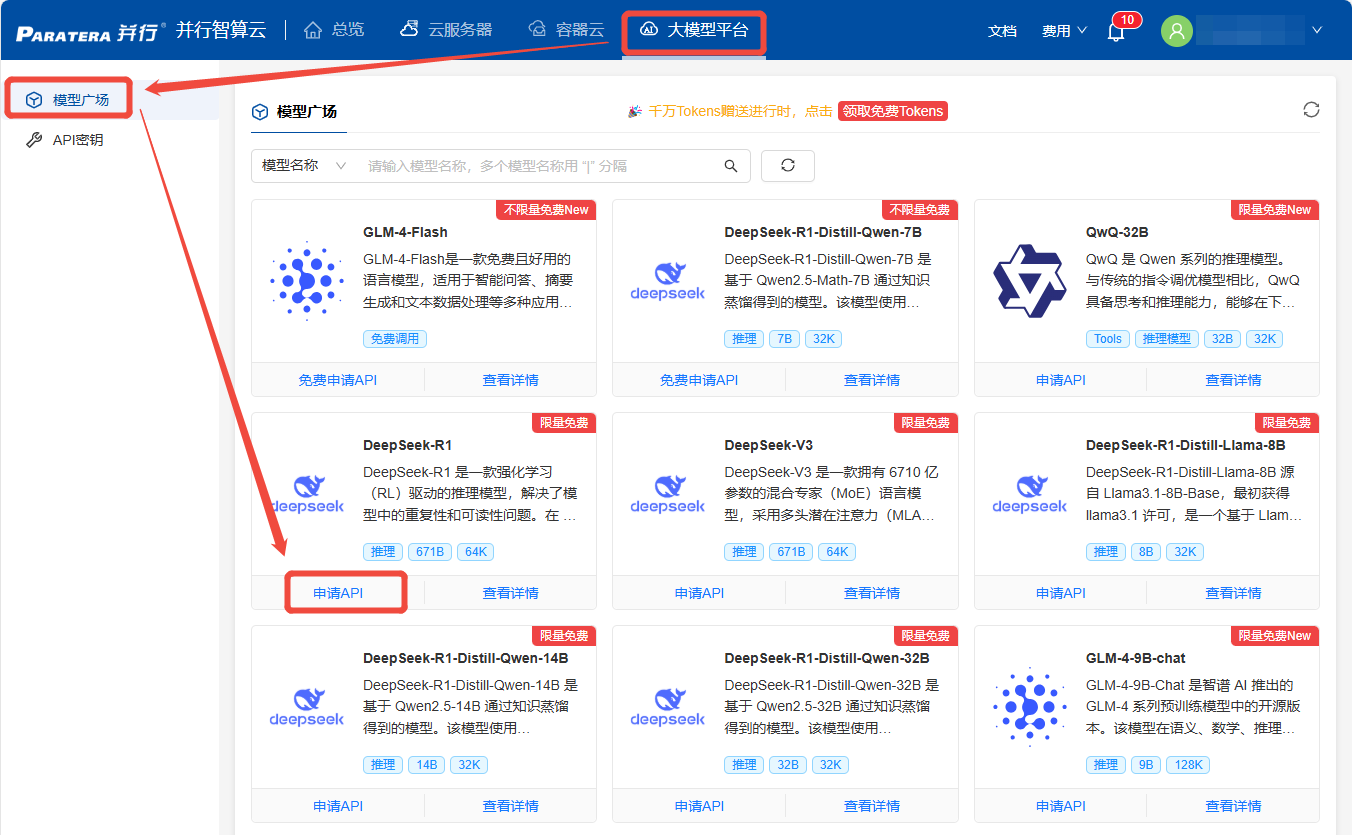
1. 访问模型广场
登录智算云平台-大模型平台 https://ai.paratera.com/#/lms/model
通过模型广场查看当前支持的模型信息(模型详情、价格、TPM/RPM限制等信息)
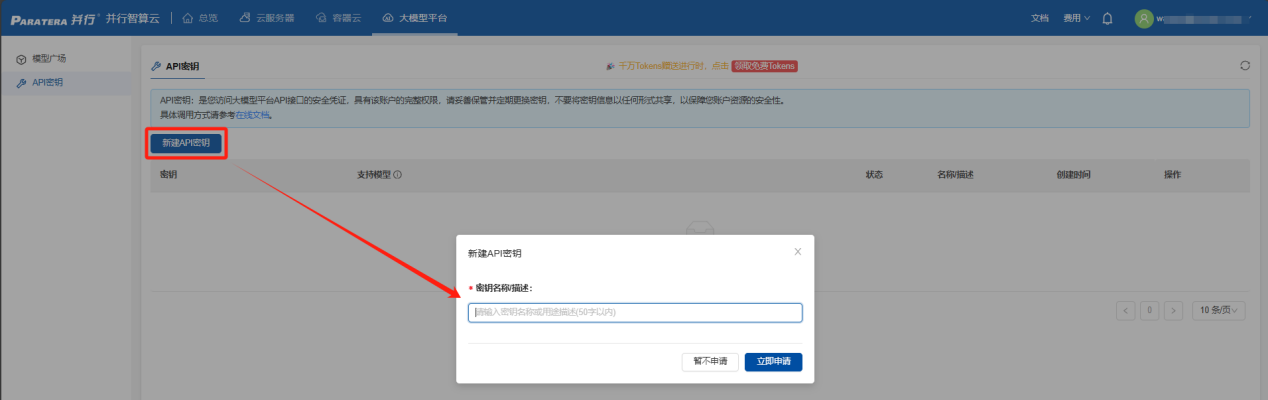
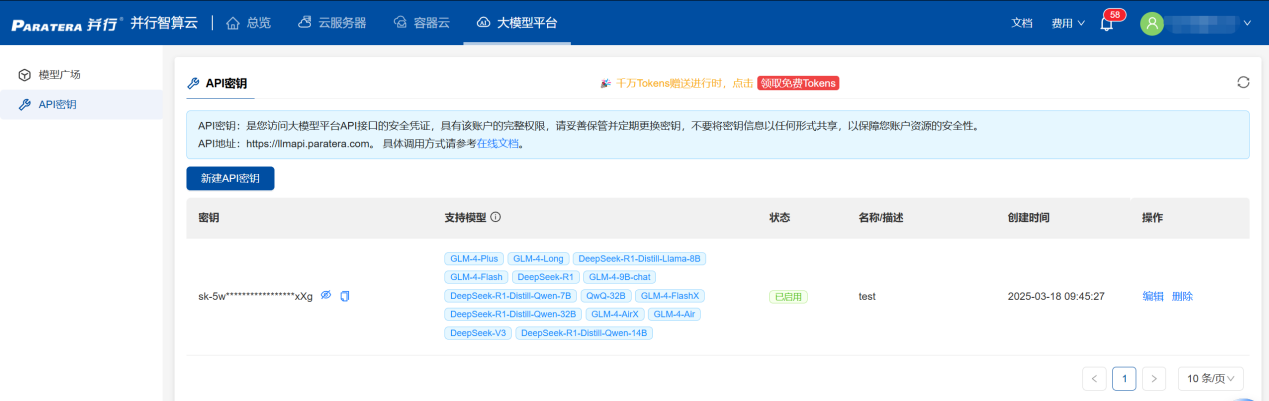
2. 获取并配置API_Key
进入【API密钥】页面,通过【新建API密钥】==>【填写密钥描述】==>【立即申请】,即可获取您的专属密钥信息。
3. 多种API接入形式
支持2种使用方式:本地客户端接入、代码接入
3.1 本地客户端接入
支持三种主流工具:Chatbox、Cherry Studio、AnythingLLM
3.1.1 Chatbox接入
(1) 本地下载安装Chatbox
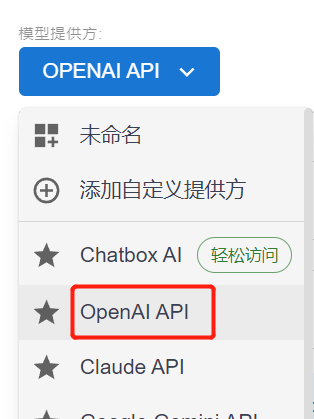
(2) 选择模型提供方为OpenAI API
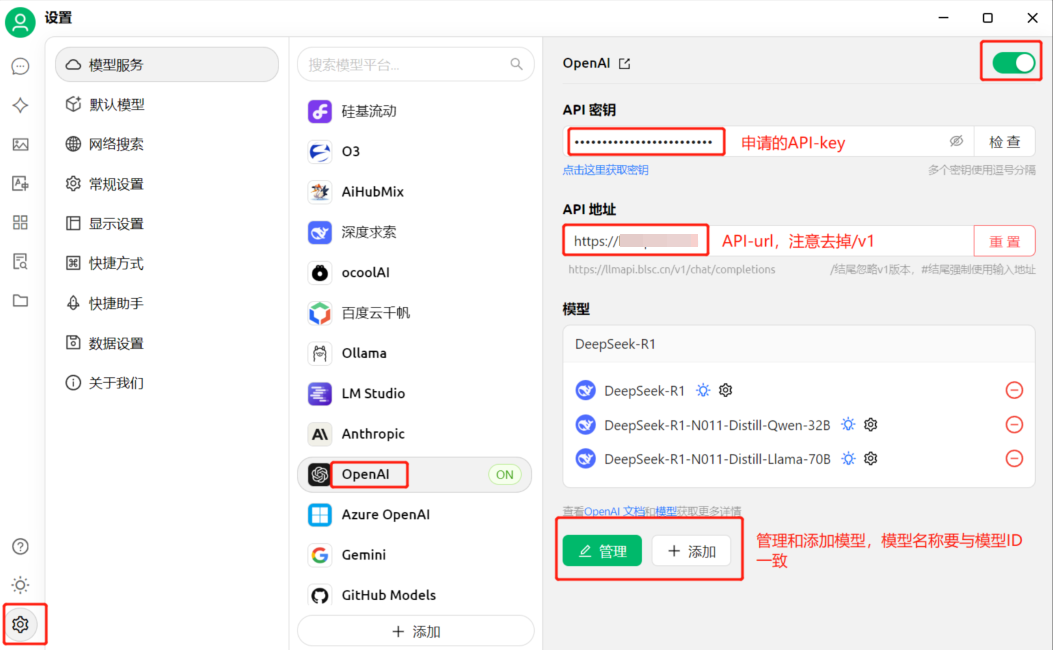
(3) 输入API密钥(API KEY)、API 域名(API URL)、模型名

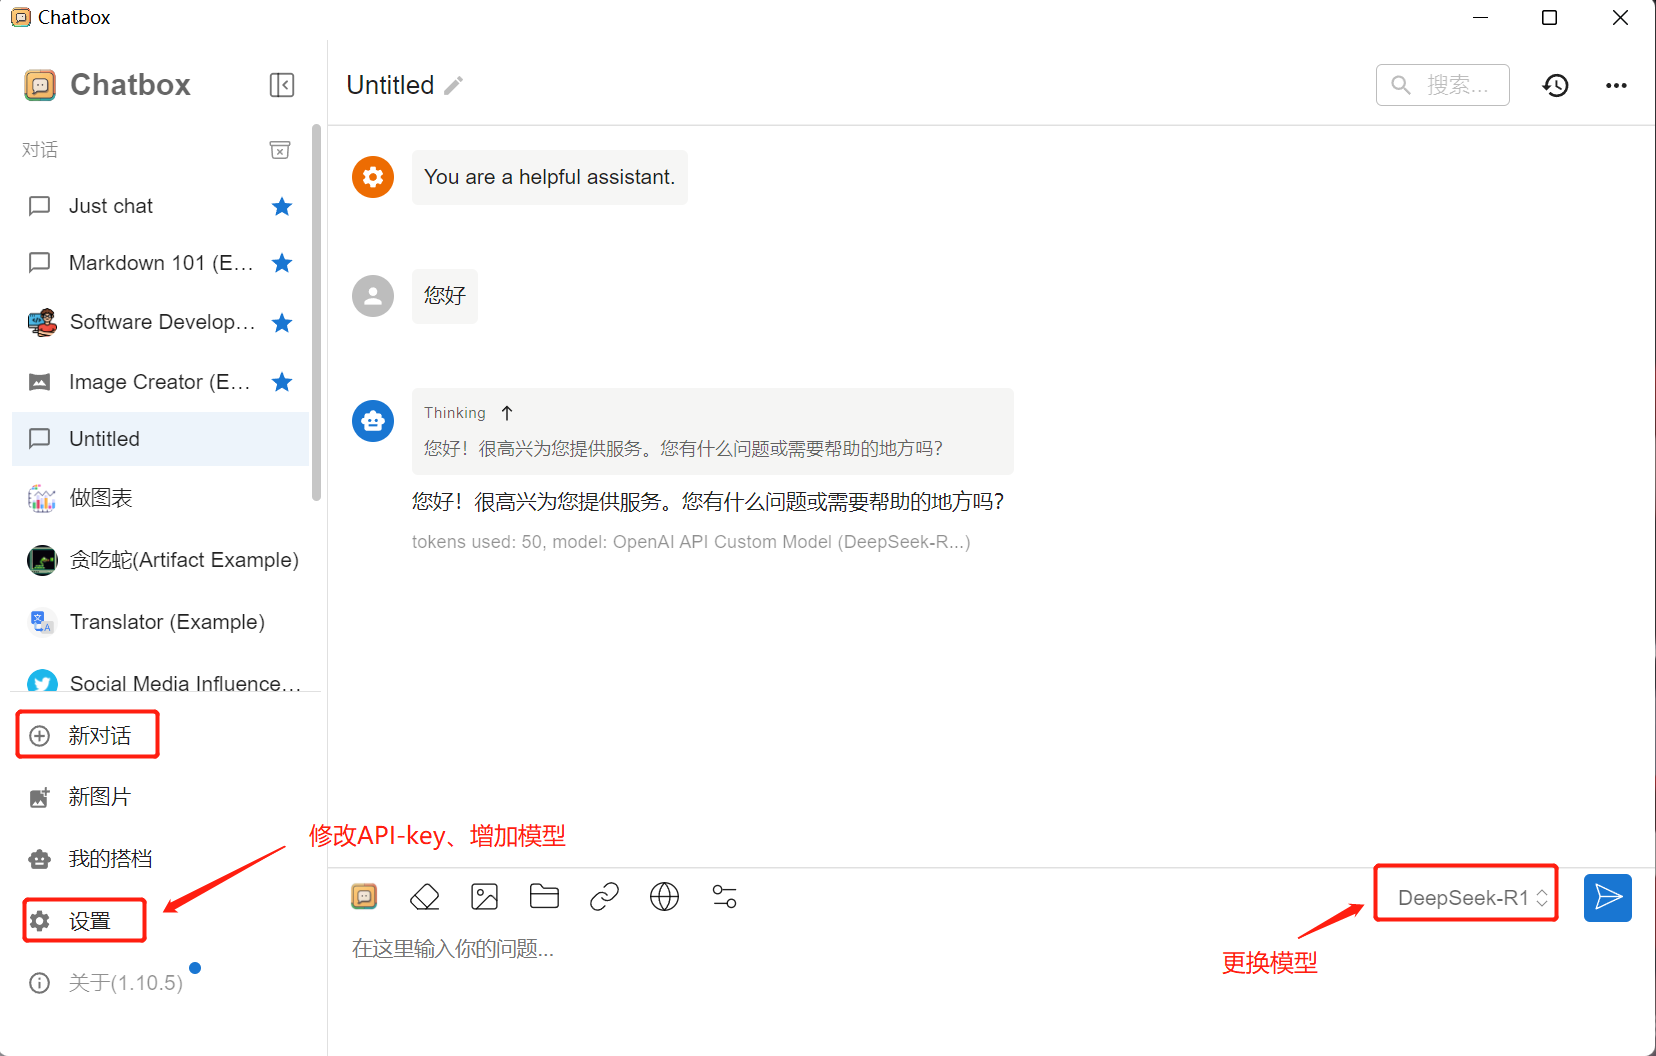
注:如果首次进入chatbox时,忘记选择【使用自己的模型】,可在对话窗口左下角【设置】里修改模型。
(4) 开启对话等功能使用
3.1.2 Cherry Studio接入
(1) 本地下载安装Cherry Studio
(2) 选择模型提供方为OpenAI
(3) 输入API密钥(API KEY)、API 地址(API URL)、模型名
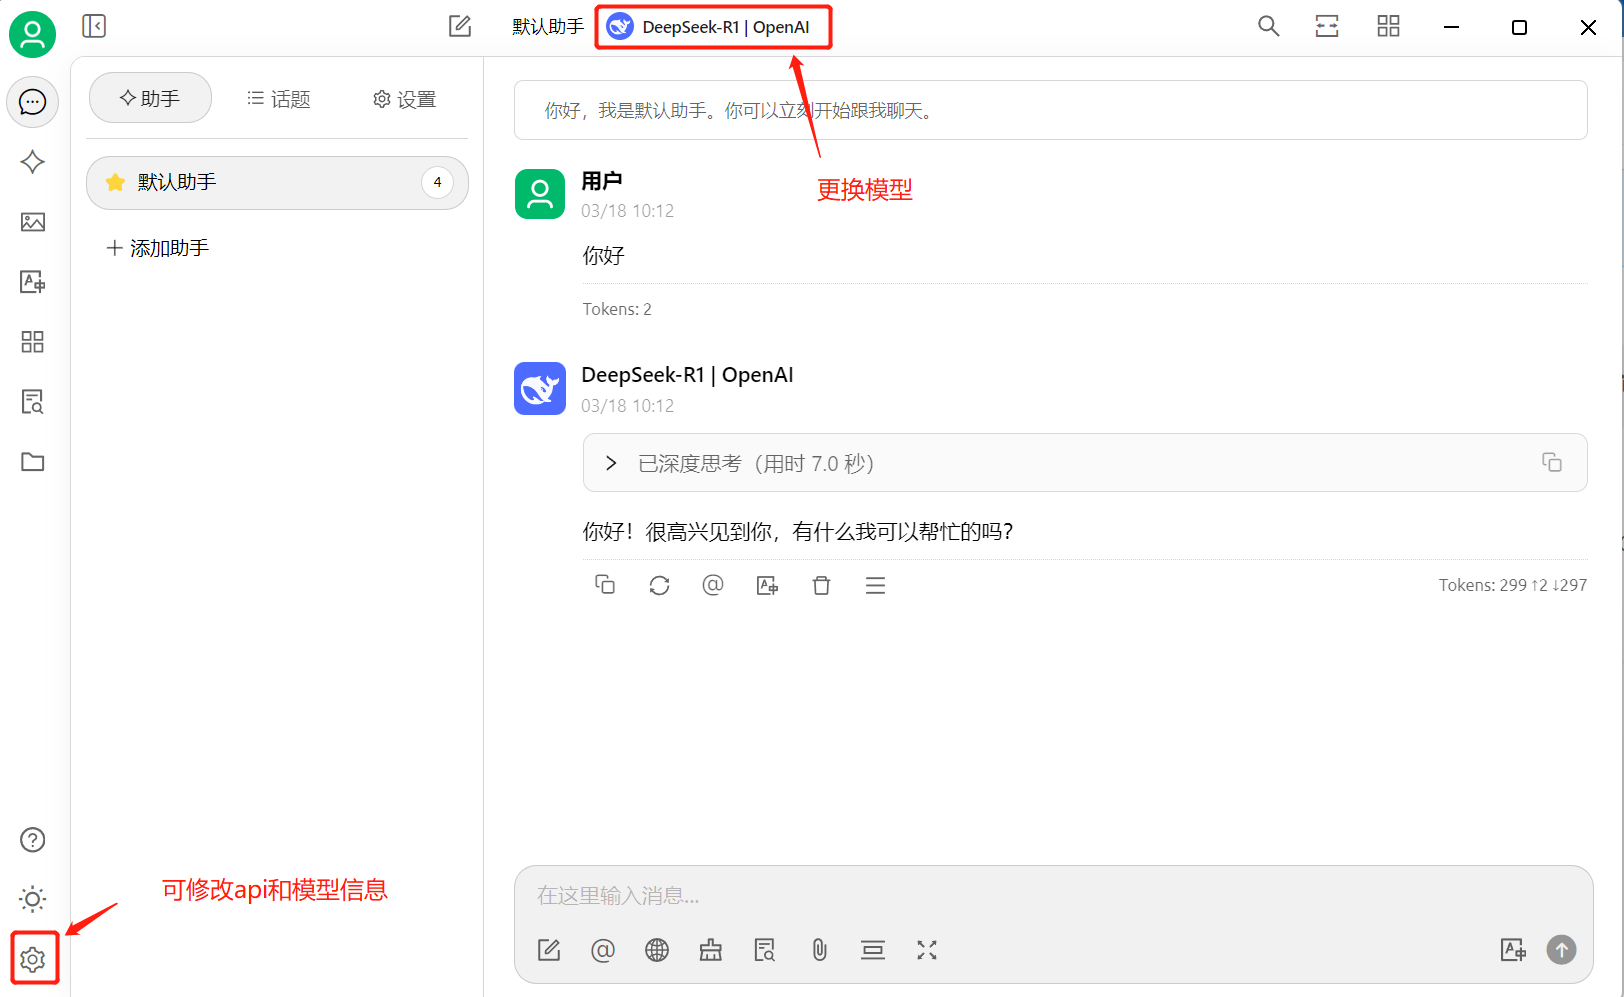
注:如果首次进入Cherry Studio时,忘记选择【使用自己的模型】,可在对话窗口左下角【齿轮】里修改模型。
(4) 开启对话等功能使用
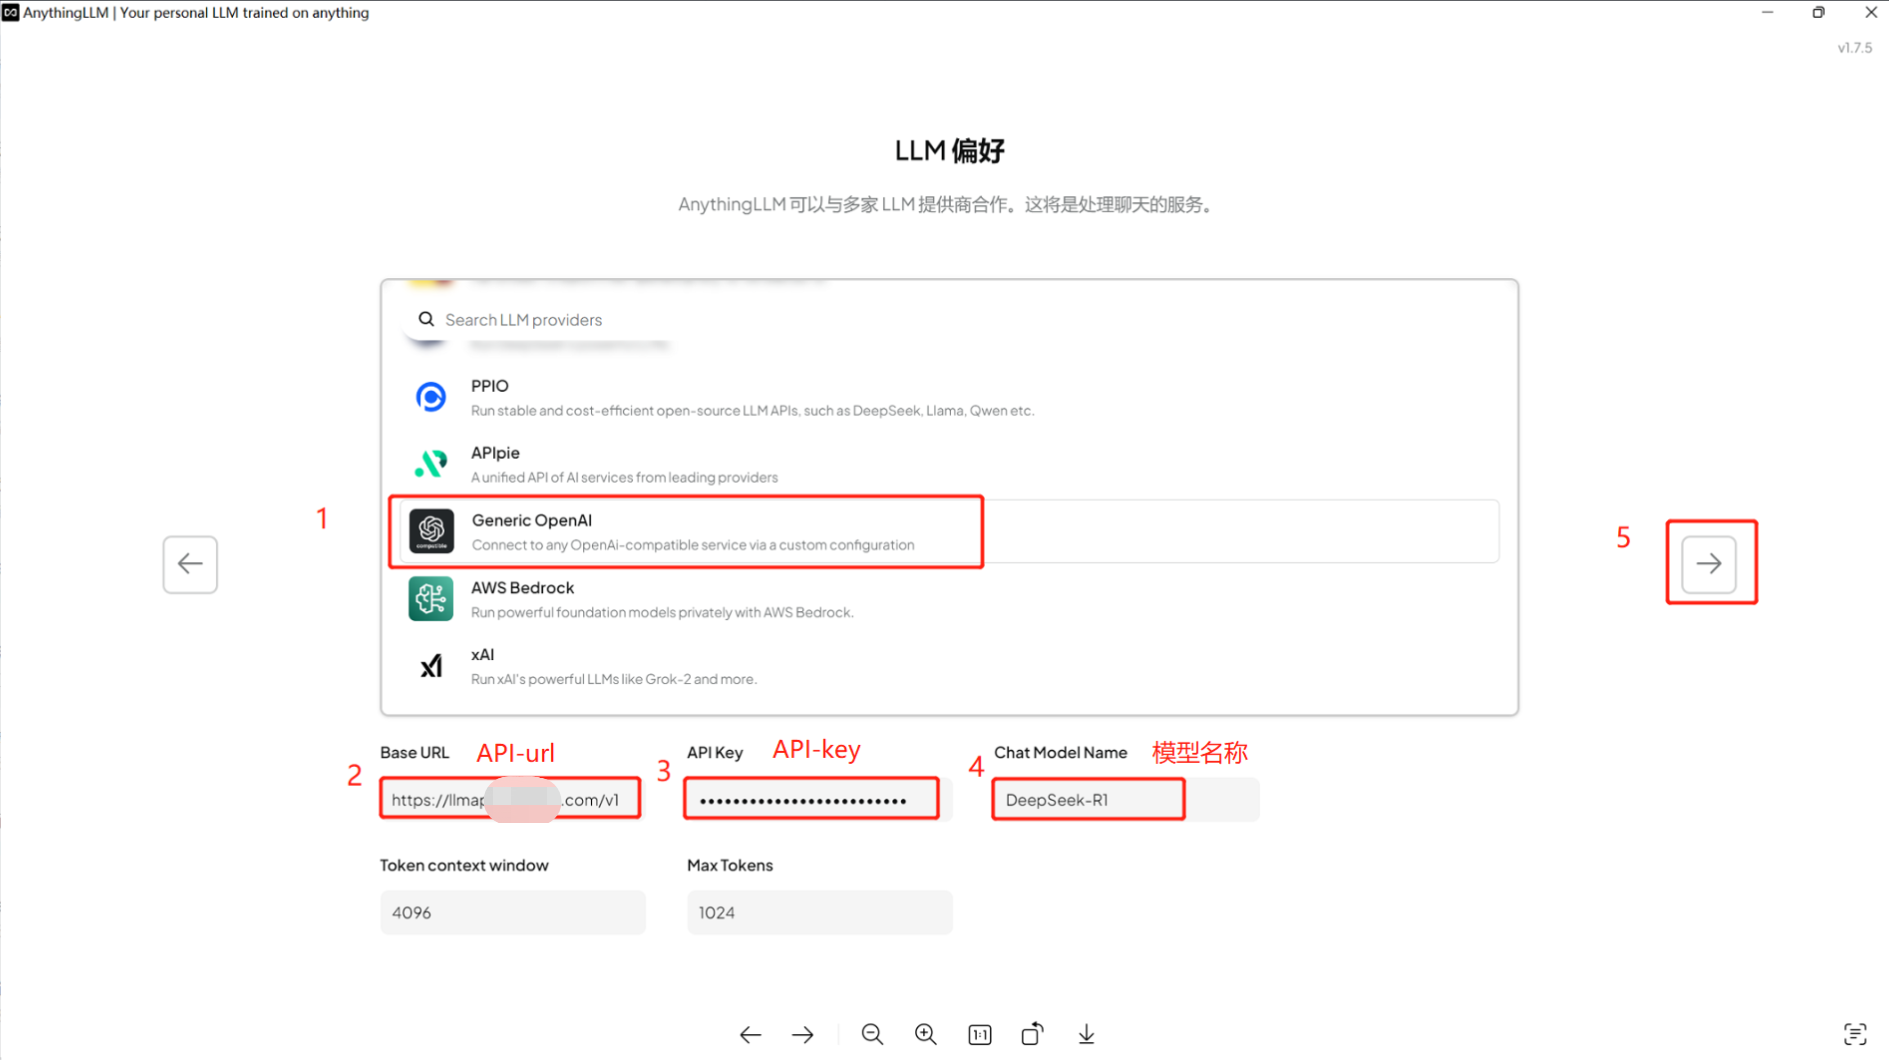
3.1.3 AnythingLLM接入
(1) 本地下载安装AnythingLLM
(2) 首次安装设置界面,选择Generic OpenAI,输入API KEY、API URL、模型名
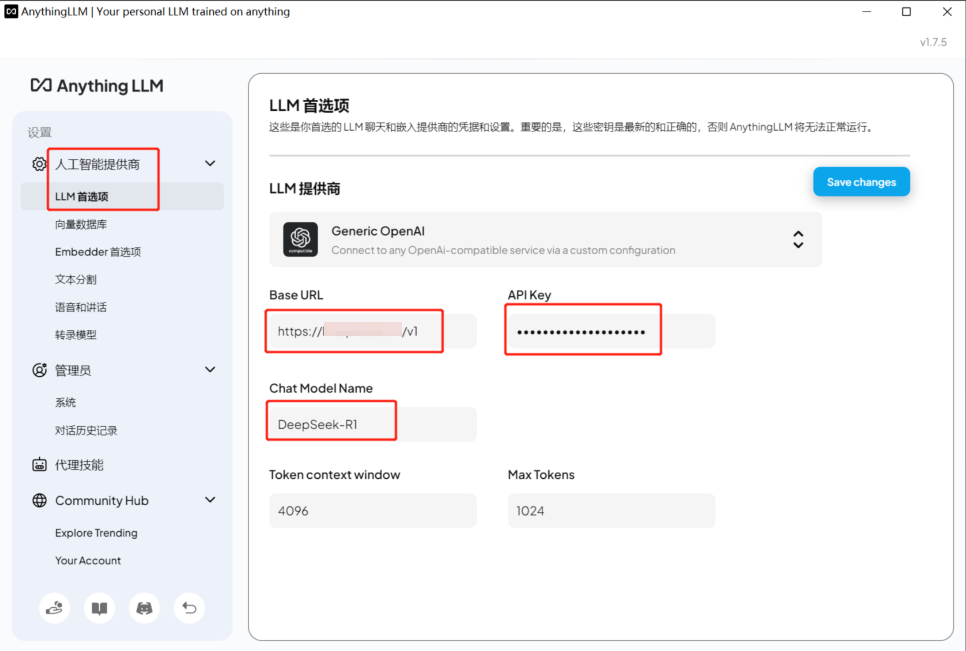
(3) 更改设置,选择左下角第四个图标
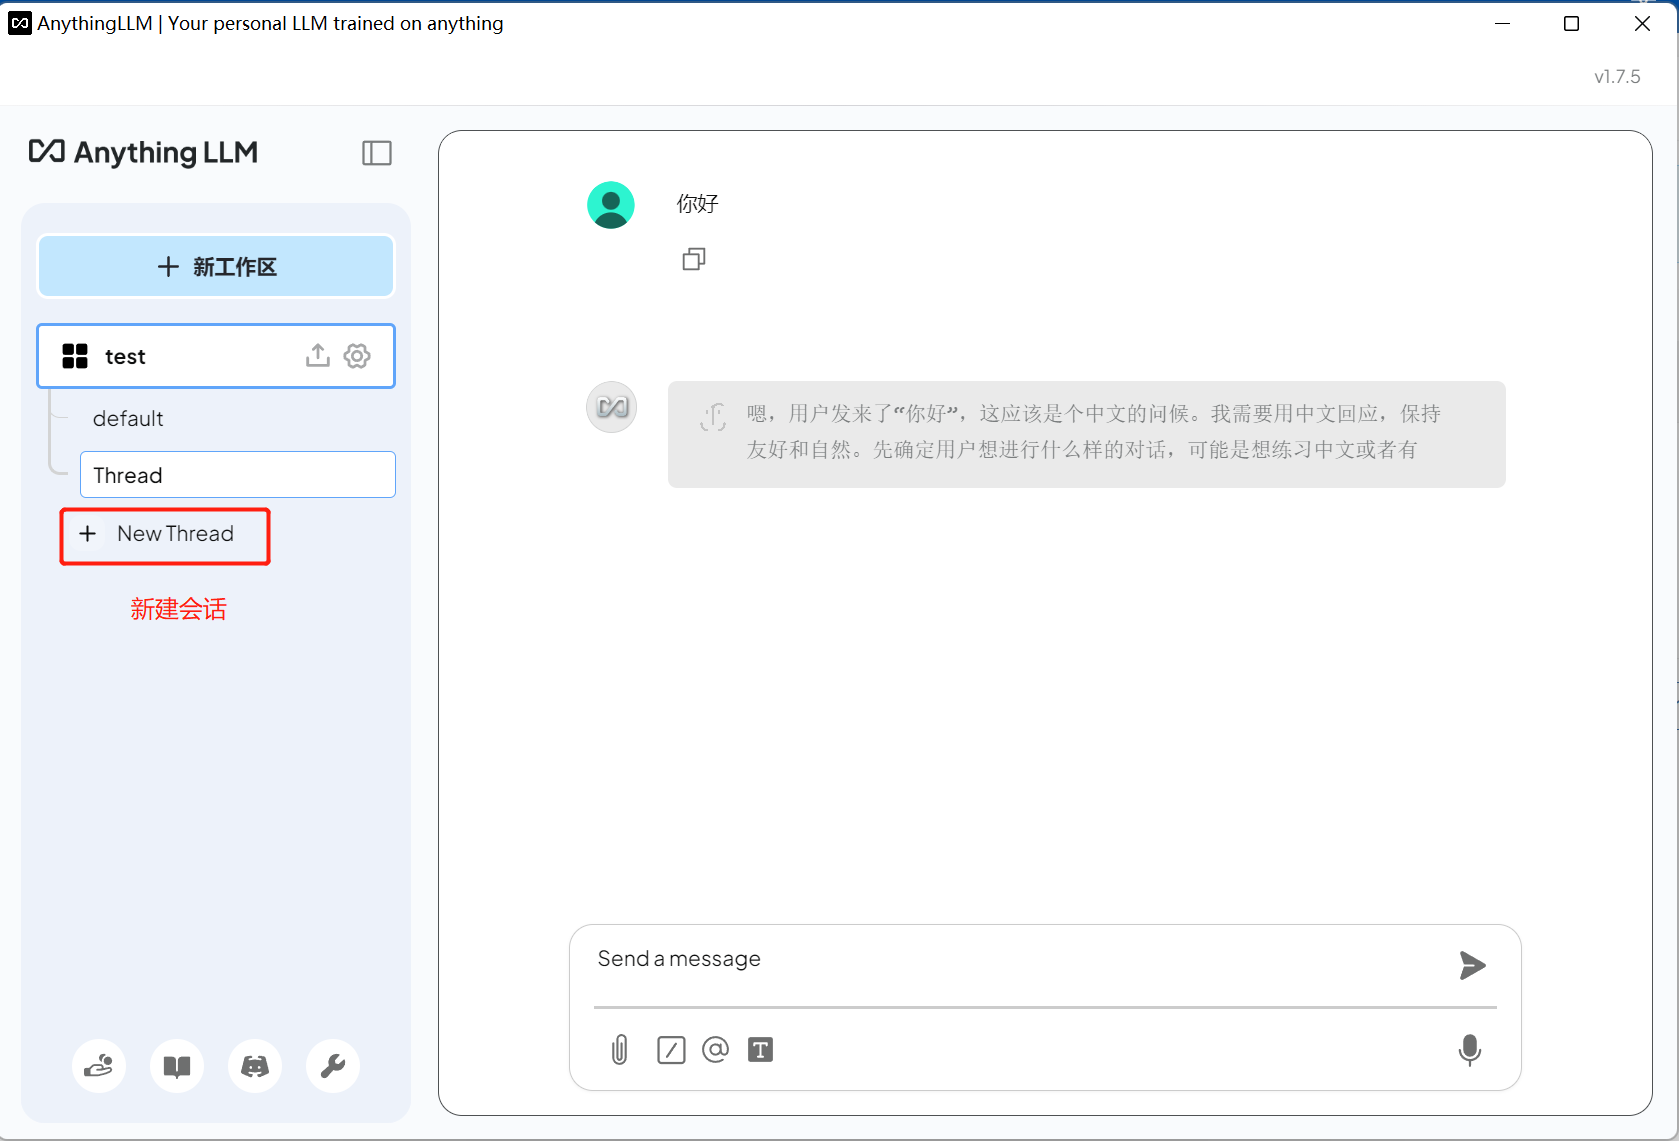
(4) 开启对话等功能使用
3.2 代码接入
支持curl、python、golang、java、nodejs等
3.2.1 curl接入
查询所有可用模型
curl --request GET \
     --url [hostname]/v1/models \
     --header 'authorization: Bearer 申请到的key' \
     --header 'content-type: application/json'
推理
curl --request POST \
  --url [hostname]/chat/completions \
  --header 'authorization: Bearer 申请到的key' \
  --header 'content-type: application/json' \
  --data '{
    "model": "模型ID",
    "messages": [
        {
        "role": "user",
        "content": "Hello World"
        }
    ]
}'
3.2.2 python接入
import openai

client = openai.OpenAI(
    api_key="申请到的key",
    base_url="[hostname]/v1/"
)

response = client.chat.completions.create(
    model="模型ID",  # model to send to the proxy
    messages=[{"role": "user", "content": "Hello World"}],
)
print(response)
3.2.3 golang接入
package main
import (
	"bytes"
	"encoding/json"
	"fmt"
	"io/ioutil"
	"net/http"
)

func main() {
	url := "[hostname]/v1/chat/completions"

	// Define and marshal the payload
	payload, _ := json.Marshal(map[string]interface{}{
		"model": "模型ID",
		"messages": []map[string]string{{
			"role":    "user",
			"content": "Hello World",
		}},
		"stream":      false,
		"max_tokens":  512,
		"temperature": 0.6,
	})

	// Create and send the request
	req, _ := http.NewRequest("POST", url, bytes.NewBuffer(payload))
	req.Header.Set("Authorization", "Bearer 申请的api-key")
	req.Header.Set("Content-Type", "application/json")

	res, err := http.DefaultClient.Do(req)
	if err != nil {
		fmt.Println("Error:", err)
		return
	}
	defer res.Body.Close()

	// Read and print the response
	body, _ := ioutil.ReadAll(res.Body)
	fmt.Println("Response:", string(body))
}
3.2.4 java 接入
import com.mashape.unirest.http.HttpResponse;
import com.mashape.unirest.http.Unirest;
import org.json.JSONObject;
import org.json.JSONArray;

public class Test {
        public static void main(String[] args) throws Exception{
                JSONObject body = new JSONObject()
                        .put("model", "模型ID")
                        .put("messages", new JSONArray().put(new JSONObject().put("role", "user").put("content", "Hello World")))
                        .put("stream", false)
                        .put("max_tokens", 512)
                        .put("temperature", 0.6);

                HttpResponse<String> response = Unirest.post("[hostname]/v1/chat/completions")
                        .header("Authorization", "Bearer 申请的api-key")
                        .header("Content-Type", "application/json")
                        .body(body.())
                        .asString();

                System.out.println(response.getBody());
        }
}
3.2.5 nodejs 接入
const axios = require('axios');

const url = '[hostname]/v1/chat/completions';

const payload = {
  model: '模型ID',
  messages: [
    {
      role: 'user',
      content: 'Hello world',
    },
  ],
  stream: false,
  max_tokens: 512,
  temperature: 0.6,
};

axios
  .post(url, payload, {
    headers: {
      Authorization: 'Bearer 申请的api-key',
      'Content-Type': 'application/json',
    },
  })
  .then((response) => {
    console.log('Response Status:', response.status);
    console.log('Response Body:', response.data.choices[0].message.content );
  })
  .catch((err) => {
    console.error('Error:', err);
  });